

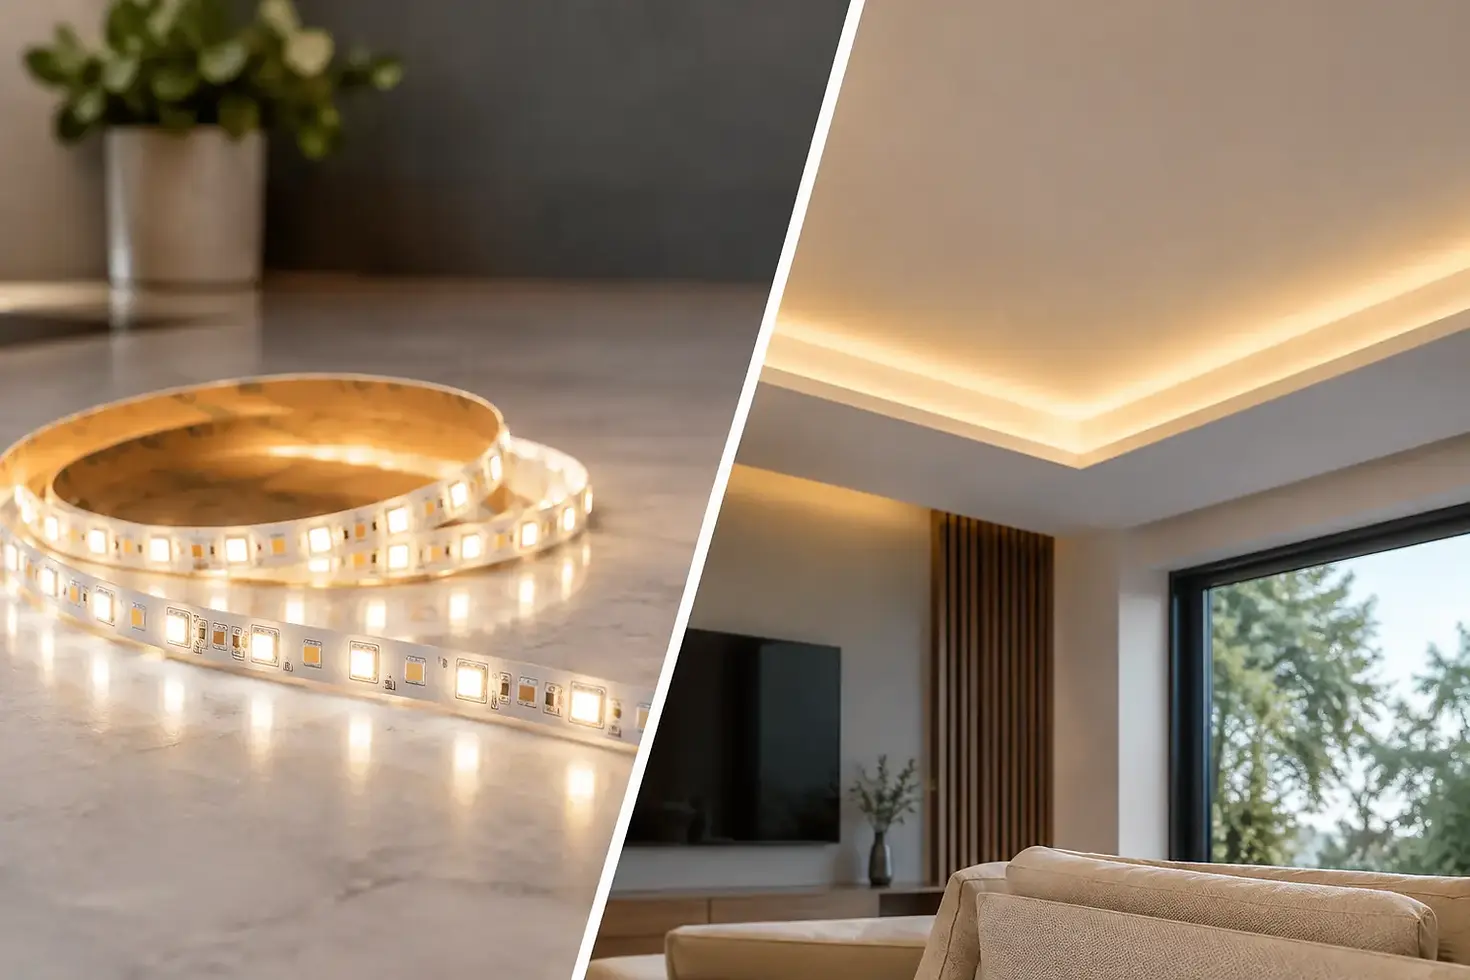
LED Tape Versus Cove Lighting for Custom Homes

A softly illuminated ceiling can make a limestone wall feel warmer, give a long hallway a sense of procession, or lend a hospitality space its evening character. Yet LED tape versus cove lighting is not quite the either-or decision it first appears to be. LED tape is a light source; cove lighting is an architectural strategy for concealing and shaping that source. The distinction matters because a beautiful result depends less on the strip itself than on the detail built around it.
For architects, interior designers, and custom-home clients, the question is really this: should light be applied to a surface, or should the architecture be formed to hold and direct it? The answer affects ceiling profiles, millwork dimensions, electrical coordination, maintenance access, and the quality of light experienced after sunset.
LED Tape Versus Cove Lighting: The Essential Difference
LED tape, also called LED strip light or tape light, is a flexible linear circuit populated with small LEDs. It can be installed in a recessed aluminum channel, beneath a shelf, inside cabinetry, along a stair, or within a purpose-built cove. It is adaptable, compact, and available in a wide range of output levels, color temperatures, color-rendering qualities, and control systems.
Cove lighting describes the concealed architectural condition that directs light upward, outward, or across a surface. A cove may be formed in drywall, plaster, wood paneling, stone, or custom millwork. It can house LED tape, but it can also accommodate a linear fixture engineered for greater output, optical control, and serviceability.
This difference is more than terminology. Specifying LED tape without defining its channel, lens, setback, driver location, and sightlines leaves the most important design decisions unresolved. Calling for cove lighting without selecting an appropriate source can produce uneven illumination, visible diode imaging, or insufficient light at the ceiling plane.
The strongest projects treat the tape, fixture, cove geometry, finish materials, and controls as one composition.
When LED Tape Is the Right Design Tool
LED tape earns its place where a fine line of light must follow custom geometry or remain nearly invisible. It is especially effective within millwork: under a floating vanity, behind an open shelf, inside a wardrobe, beneath a handrail, or at the toe kick of a kitchen island. In these applications, the light is close to the surface and serves both function and atmosphere.
Its flexibility also suits curved forms and restoration-sensitive interventions where a large fixture would be intrusive. A carefully selected tape installed in an extruded aluminum profile can provide a clean, controlled detail with effective heat management. The profile matters. It protects the tape, gives the installer a precise mounting surface, and, when paired with a quality diffuser, softens the individual points of light.
For decorative millwork and lower-output accent applications, LED tape can be an elegant, economical solution. It is not, however, automatically inexpensive once the project requires premium tape, channels, lenses, remote drivers, dimming modules, concealed access, and skilled installation. A low initial fixture cost can be erased quickly by poor coordination or an improvised field condition.
Color quality deserves equal attention. Warm-dim tape can support a residential evening setting, shifting toward the warmer tone associated with incandescent sources as it dims. High color-rendering options are valuable around artwork, natural woods, textiles, and richly veined stone. For an interior built around exceptional materials, flat or inconsistent color can undermine the very surfaces the lighting was intended to honor.
The Limits of Exposed Tape
Bare LED tape is rarely appropriate where it can be directly seen. Even when the individual diodes are small, exposed points of light can feel visually harsh and technically unfinished. A diffuser can improve appearance, but it cannot correct every issue. If the source is too close to a reflective stone backsplash, glossy lacquer, or painted ceiling, the resulting scallops and bright bands may remain apparent.
Tape is also vulnerable to failures caused by inadequate heat dissipation, voltage drop over long runs, or drivers placed where they cannot be reached. Long linear installations require thoughtful feed locations and voltage planning. A continuous visual line may need multiple electrical feeds to remain consistent from end to end.
What Cove Lighting Adds to a Room
A well-proportioned cove changes the perceived shape of a room. Rather than adding another visible fixture, it makes light appear to emerge from the architecture itself. The ceiling seems to lift, walls gain depth, and the transition from day to evening becomes gentler.
This approach is particularly compelling in great rooms, corridors, primary bedrooms, galleries, dining spaces, and hospitality interiors. In the Texas Hill Country, where homes often combine plaster, timber, steel, and stone, cove lighting can reveal texture without crowding the ceiling with decorative hardware. It gives the architecture room to breathe.
The cove must be sized for the source and the desired effect. A shallow slot may create a narrow luminous edge. A deeper pocket with a greater setback can wash a broad area of ceiling with softer, more diffuse light. The aiming angle, distance to the illuminated plane, interior finish of the cove, and fixture output all influence the result.
A cove should not be treated as a universal replacement for downlights. It offers ambient light and a strong sense of volume, but it may not provide the vertical illumination needed for reading art, preparing food, dressing, or navigating steps. Layered lighting remains essential. Cove light is often most successful when paired with discreet task lighting, carefully placed accent lighting, and decorative fixtures selected for their presence as objects.
Cove Lighting Requires Early Coordination
The best cove details are resolved before framing and drywall, not after finishes are underway. Early planning allows the design team to establish dimensions, framing support, electrical rough-in, driver locations, access panels, and transitions at corners or ceiling beams. It also prevents a common disappointment: a cove that is too shallow to hide the source from normal viewing angles.
Serviceability is a mark of exceptional craftsmanship. Drivers and control gear will eventually need attention, even when the LED source has a long projected life. Access does not need to compromise the design, but it should be deliberate. A removable millwork panel, accessible closet ceiling, or discreetly integrated service location is far preferable to cutting into finished plaster years later.
Selecting the Right Source Inside the Cove
LED tape can be excellent inside a cove when the cove is modest in scale and the required output is moderate. It is adaptable around corners and can be fitted into a channel that improves heat management and produces a cleaner installation. In a short residential run, this can be a precise and effective approach.
For taller spaces, longer runs, or ceilings that demand a very even wash, a dedicated linear fixture may be the better choice. These fixtures typically provide more predictable optics, stronger thermal performance, and more consistent illumination across substantial distances. Their initial cost may be higher, but they can reduce visual risk and simplify long-term maintenance.
The choice also depends on the ceiling finish. Matte plaster is forgiving and often responds beautifully to a soft upward wash. High-gloss paint, polished stone, or reflective metal will reveal every irregularity in source placement and surface condition. In those settings, mockups are not a luxury. A sample length installed at the intended setback can reveal glare, banding, brightness, and color concerns before the detail is repeated throughout the project.
Detail, Dimming, and Color Temperature
A successful linear-lighting plan is calibrated, not merely bright. In a residence, 2700K often creates a warm, relaxed atmosphere, while 3000K can suit cleaner contemporary interiors, active kitchens, and certain commercial settings. The correct choice should relate to the material palette, available daylight, and the character of adjoining fixtures. Mixing unrelated whites can make a carefully designed interior feel accidental.
Dimming must be specified as a complete system. Tape, driver, control type, and dimmer must be compatible. Poor matching can cause flicker, visible stepping, limited dimming range, or an abrupt drop-out at low levels. For spaces designed to host, restore, or rest, the lower end of the dimming curve matters as much as full output.
Consider the view from every normal position in the room. A source that disappears from the entry may become visible when someone reclines on a sofa or climbs a stair. Lighting details should be reviewed from the perspectives people actually inhabit, not only from a reflected ceiling plan.
A More Useful Way to Decide
Choose LED tape when the project calls for compact, flexible, close-to-surface illumination, particularly within millwork or other custom details. Choose a purpose-built cove when the goal is to reshape the room with concealed ambient light. Choose both when the cove provides the architecture and the tape, properly profiled and specified, provides the source.
The finest answer is rarely the fastest product selection. It comes from developing the detail alongside the architecture, then testing light against the surfaces that give the project its identity. When that work is done with artistic vision and technical clarity, linear light stops looking like an added feature and begins to feel like part of the building's original intention.


Comments